Tag: Kitchen

  • How to Get Rid of Fruit Flies?

    How to Get Rid of Fruit Flies?

    Learn how to get rid of fruit flies quickly and efficiently with this comprehensive guide. Find out what attracts them and how to keep a clean kitchen.

    How to Get Rid of Fruit Flies? A Comprehensive Guide

    They can be a persistent problem in the kitchen, but with the right approach, you can effectively get rid of them. Here’s a more detailed and comprehensive guide to help you eliminate fruit flies:
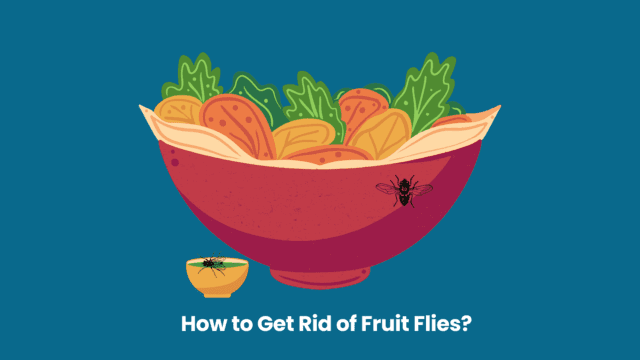
    How to Get Rid of Fruit Flies Image
    Photo from ilearnlot.com

    Remove Attractive Food Sources:

    Fruit flies are attracted to overripe or decaying fruits and vegetables, as well as fermenting liquids. Inspect your kitchen for any produce that is past its prime and discard it immediately. It’s essential to be thorough and check all areas where fruits and vegetables are stored, including countertops, fruit bowls, and refrigerators. Additionally, clean up any spills promptly and ensure that all food items are properly sealed.

    Clean the Kitchen:

    Fruit flies thrive in unclean environments, so maintaining cleanliness is crucial. Start by thoroughly cleaning all surfaces in your kitchen, including countertops, sinks, and floors. Pay special attention to areas where food particles may accumulate, such as drains and trash cans. Use a mixture of warm water and dish soap to wipe down surfaces, and consider using a disinfectant spray to kill any lingering bacteria. Regularly empty and clean your trash cans to reduce the risk of fruit fly infestations.

    Create a Vinegar Trap:

    Vinegar is an effective attractant for fruit flies. To make a vinegar trap, follow these steps: Take a small bowl and fill it with apple cider vinegar, red wine vinegar, or white vinegar. Add a drop of dish soap to break the surface tension. Cover the bowl with plastic wrap and secure it with a rubber band. Finally, use a toothpick or a sharp object to poke small holes in the plastic wrap. Fruit flies will be attracted to the vinegar scent, enter through the holes, and get trapped in the liquid.

    Use a Fruit Fly Trap:

    In addition to homemade vinegar traps, there are commercially available fruit fly traps that you can purchase. These traps use attractive scents or sticky surfaces to lure and capture fruit flies. Follow the instructions provided with the trap to set it up correctly. Place the trap in areas where fruit flies are commonly seen, such as near fruit baskets or garbage cans. Remember to replace or refill the trap as needed.

    Keep Trash Bins Covered:

    Fruit flies are opportunistic and will use any available food source, including your garbage. To prevent fruit flies from accessing your trash, make sure to keep your trash bins covered with tight-fitting lids. Additionally, empty your trash regularly, especially if it contains food waste or organic matter that might attract fruit flies.

    Cover Fruit Bowls:

    If you like to keep a fruit bowl on your kitchen counter, cover it with a mesh or plastic wrap. This barrier will prevent fruit flies from accessing the ripe fruit while still allowing airflow. Alternatively, storing fruits in the refrigerator can also discourage fruit flies from infesting them.

    Seal Entry Points:

    Fruit flies can enter your home through small gaps and openings in windows, doors, and screens. Inspect these entry points and seal any gaps or holes to prevent fruit flies from entering. Weatherstripping and caulk can be used to seal gaps while repairing or replacing damaged screens can help keep fruit flies out.

    Clean Drains:

    Fruit flies can breed and feed on organic matter that accumulates in drains. Regularly clean your drains to eliminate potential breeding sites. Start by pouring boiling water down the drain to flush out any debris, then follow up with a mixture of vinegar and baking soda. Let the mixture sit for a few minutes before flushing the drain with hot water again. This will help remove any residue and eliminate fruit fly breeding grounds.

    Keep the Kitchen Dry:

    Moisture attracts fruit flies, so it’s important to keep your kitchen as dry as possible. Fix any plumbing leaks promptly and wipe down wet surfaces, such as sinks and countertops. Be diligent in drying dishes after washing them, as even a few drops of standing water can attract fruit flies. By minimizing moisture, you make your kitchen less hospitable to fruit flies and reduce their chances of breeding.

    Maintain a Fly-Free Environment:

    In addition to the above steps, you can employ various methods to minimize the presence of fruit flies in your kitchen. Consider using a fly swatter or fly spray to eliminate fruit flies that are already present. Keep windows and doors closed unless fitted with screens to prevent more flies from entering. Avoid leaving ripe or rotting fruits and vegetables exposed; instead, store them in airtight containers or the refrigerator.

    By following these comprehensive steps, you can effectively eliminate fruit flies and keep your kitchen free from these pesky pests. Remember that consistency is key when dealing with fruit flies, as it may take some time to completely eradicate them. Continue practicing good sanitation habits to prevent reinfestation and enjoy a fruit fly-free environment in your kitchen.

    Why is it Important to Get Rid of Fruit Flies?

    Fruit flies may seem like harmless insects, but it is important to get rid of them for several reasons:

    1. Health Risks: Fruit flies are known to carry and spread bacteria, yeast, and other pathogens. They can contaminate your food and surfaces, increasing the risk of foodborne illnesses. Eliminating fruit flies helps to maintain a hygienic and safe environment in your kitchen.
    2. Food Preservation: Fruit flies are attracted to overripe or damaged fruits and vegetables, as well as fermenting liquids. By getting rid of fruit flies, you can prevent them from infesting and spoiling your fresh produce. This helps in preserving your food for longer and reduces unnecessary waste.
    3. Nuisance and Annoyance: Fruit flies are small, fast-flying insects that can be a constant annoyance in your kitchen. They can disrupt meal preparation, contaminate food, and even invade your personal space. By eliminating fruit flies, you can restore a peaceful and enjoyable environment in your kitchen.
    4. Prevention of Infestations: Fruit flies have a short lifecycle and reproduce quickly. If left unchecked, a small fruit fly problem can turn into a full-blown infestation in a matter of days. By taking proactive measures to get rid of fruit flies, you can prevent them from multiplying and infesting your kitchen or other areas of your home.

    It is important to protect your health, preserve your food, maintain a pleasant living environment, and prevent infestations. By following the comprehensive guide provided, you can effectively eliminate fruit flies and ensure a fruit-fly-free kitchen. Happy pest-free living!

    Bottom line

    This comprehensive guide provides helpful tips and strategies for getting rid of fruit flies in your kitchen. It includes steps such as removing attractive food sources, cleaning the kitchen thoroughly, using vinegar traps and fruit fly traps, keeping trash bins covered, covering fruit bowls, sealing entry points, cleaning drains, keeping the kitchen dry, and maintaining a fly-free environment. By following these steps, you can effectively eliminate fruit flies and prevent infestations. Remember, getting rid of fruit flies is important for health reasons, food preservation, avoiding nuisance, and preventing infestations. Enjoy a fruit fly-free kitchen and happy pest-free living!

  • Best Drinking Water test kit for Feasible Guide and Tips

    Best Drinking Water test kit for Feasible Guide and Tips

    A Drinking water test kit – a Feasible Guide and Tips to the Perfect Water Testing Kit; While purchasing a lavish house, you keep an eye on every single aspect. From construction to decoration, you spend all your savings. Water is a major concern of every house owner either for drinking or cleaning purposes. Water is an inevitable necessity of life. You cannot skip a day without water. Water is colorless, odorless and, tasteless form is the fundamental requirement of the body. Besides drinking, the water supply at home uses for cleaning, washing and, cooking purposes.

    A Feasible Guide and Tips to the Perfect and Best Water Test Kit; The necessity of Pure Water

    Pure and hygienic water is necessary not only for drinking purposes but also for cleaning. Impure water causes several diseases that may lead to one’s death. These diseases include cholera, dysentery, hepatitis A, typhoid, diarrhea, dysentery and, polio. Contaminated or hard water not only causes diseases but if used for washing purposes, it will not clean clothes as hard water doesn’t dissolve detergents.

    One should assuredly check whether the water supplied in the house is hygienic or not. For this purpose, there are several testing kits launched by FullyHome. Here is a list of water testing kits that will help you determine what and how much an element contaminates your regular use of water.

    Test Strip For Water Hardness;

    FullyHome is offering you professional testing strips at an affordable price. These strips are specially designed for the detection of the hardness of the water. Hard water is a serious issue as it is indigestible and for cleaning purposes, it is ineffective. The resulting method is easy. The strip indicates specific colors. These strips are non-reusable. They are for a single-time use only.  

    Test Kit For City Water;

    FullyHome launched a Watersafe testing kit for testing drinking water. Also, This kit is user-friendly and easy to handle. It comes at an affordable price. Its strips are easy to read. These strips give a range of values indicating how contaminated water is. Moreover, this kit gives you results over pH value. It also indicates the presence of bromine or if water is alkaline. But the strip is for one-time use only. Its result satisfies but not as laboratory testing.

    Test Kit For Heavy Metals;

    If you are suspicious that water contaminates with heavy metals such as copper, lead and, mercury, then you should buy a testing kit for heavy metals by FullyHome. It is affordable. It is user-friendly. Heavy water is highly dangerous for health even if taken in a short amount. Detecting heavy metals in water is not easy even if there is a bad odor.

    Test Kit For Water Contaminated With Lead;

    Water testing kit for lead by FullyHome is worth buying. Lead is the most common contaminant found in house-pipe water. Its small intake can cause numerous diseases. Also, This kit design to test water at different times of the day. The ideal time to test water is morning as it remains there overnight. It is affordable as every other product. It is user-friendly. The results are accurate. This kit design for one-time use only.

    Best Drinking Water test kit for Feasible Guide and Tips Image
    Best Drinking Water test kit for Feasible Guide and Tips; Image by Susan Sewert from Pixabay.
  • Easy Cooking Recipes of Homemade Ciabatta Bread

    Easy Cooking Recipes of Homemade Ciabatta Bread

    Easy Cooking Recipes of Homemade Ciabatta Bread by Jenny Jones


    Look what I made! It was just an experiment but it turned out to be amazing! Anyone can make no knead bread without a Dutch oven. The secret is to create steam inside the oven just like it’s created inside a Dutch oven. And it’s easy. Steam is what makes a crispy crust and it’s really easy. What you do is put a small pan in the oven before you preheat it and then when it’s hot, you put in the bread to bake and pour some hot water into the small pan and it bursts into steam right away and fills up the oven. Then you quickly close the oven door to keep the steam inside and after 30 minutes, you will have an amazing loaf of ciabatta bread with a soft interior full of lovely holes and a beautiful golden crispy crust.

    You can use a variety of pans to create the steam (do a Google search for ideas if you like) but I find that process is not easy on the pan. I prefer this disposable foil pan because it’s small and fits right next to the baking pan in my oven. But if it does not fit on the same rack as your baking pan, just place it on a rack below. You may have to remove a rack to make room but whether beside the bread or on a rack below, keep it off to the side and don’t put it directly under the bread. Either way, place the muffin pan close to the front for easy access. Here is how I place mine and how you can place it below if your oven is smaller.

    I pour about 3/4 cup of hot tap water into 3 or 4 of the muffin cups. It’s good to use an oven glove when you pour the hot water because it creates steam right away and be sure to close the oven door immediately so the steam can’t escape. You can re-use the muffin pan, although it will turn dark. So there it is. I hope my photos help and now everyone who does not have a Dutch oven will be able to make this fabulous no knead, easy, homemade crusty ciabatta bread.

    Click here for the recipe. – Jenny Jones

    Recipes of No Knead Ciabatta Bread


    No Dutch oven needed. Pouring hot water into a hot pan to create steam in the oven is what gives a crispy crust. Various oven-safe pans work but it’s hard on the pans so I use (& re-use) a disposable foil 6-cup muffin pan, placed near the bread. You can start this dough the night before by switching to COOL water and let the dough rest overnight on the counter top for 8 to 24 hours. Aerate your flour before measuring! Jenny Jones

    • Prep Time: 5 minutes
    • Cook Time: 30 minutes
    • Total Time: 4 hours, 10 minutes
    • Makes: One loaf

    Ingredients:


    • 3 cups all-purpose or bread flour (360 gms)
    • 1/4 teaspoon yeast (active dry or instant)
    • 1 teaspoon salt
    • 1 1/2 cups hot water, not boiling (354 mL) – I use hot tap water – about 125-130° F (about 2 Tablespoons extra flour for shaping)

    Instructions:


    • Combine flour, yeast and salt in a large bowl. Stir in water until it’s well combined.
    • Cover with plastic wrap and let stand at room temperature for 3 hours.
    • After 3 hours dough will become puffy and dotted with bubbles. Transfer it to a well-floured surface and sprinkle dough with a little flour. Using a scraper fold dough over 10-12 times & shape into a rough 12-inch loaf.
    • Place on a parchment paper-lined baking pan and cover with a towel. Let stand on counter top for 35 minutes.
    • Meantime place a disposable 6-cup muffin pan or other small pan in the oven, making sure there is room for your pan – if not, place the tin on a lower rack. Preheat oven to 450° F.
    • After a 35-minute rest, the dough will puff up a little. Place it in the oven and carefully pour about 3/4 cup of hot tap water into 3 or 4 muffin cups or small pan. Close oven door immediately and bake for 30 minutes.

    Easy Cooking Recipes of Homemade Ciabatta Bread


  • Easy Cooking Recipes of Angel Hair Casserole

    Easy Cooking Recipes of Angel Hair Casserole

    Easy Cooking Recipes of Angel Hair Casserole by Jenny Jones


    This easy casserole just might become your new family favorite. I’ve been making it for years and everyone loves it. And I love it for two reasons. One: it’s delicious. Two: it’s easy to make. Angel Hair Casserole, It takes just a few simple ingredients and less than an hour for some good homemade comfort food. By using lean ground beef and reduced fat cheese, I never feel stuffed after my second and third helping.

    Much of the flavor comes from the sauce and you can use a homemade marinara but I use store-bought sauce. Two that I like, but can’t always find, are Silver Palate Low Sodium Marinara but this time I couldn’t find it so I used Terlato Kitchen Pomodoro, also lower in sodium and it was fantastic. Not all jarred sauces are the same so I encourage everyone to read the label for the least number of ingredients as well as sodium. Even with a low sodium sauce, this recipe doesn’t even need salt or pepper.

    And don’t be tempted to use more pasta. It will seem like it’s not enough when you put it together but it’s just the right amount for this easy family casserole.

    Click here for the recipe. – Jenny Jones

    Angel Hair Casserole Cooking Recipes


    This is the perfect family dinner. Try to find a good quality, low sodium, jarred marinara sauce. Angel Hair Casserole can stick together after draining so I use tongs to place it in the casserole. – Jenny Jones 

    • Prep Time: 30 minutes
    • Cook Time: 20 minutes
    • Total Time: 50 minutes
    • Makes: 4 servings

    Ingredients:


    • 1 teaspoon olive oil
    • 1/2 cup chopped onion
    • 1 clove garlic, minced
    • 2 cups sliced or diced mushrooms
    • 1 pound lean ground beef
    • 24 ounce jar marinara sauce (about 2 1/2 cups)
    • 6 ounces angel hair pasta
    • 4 ounces reduced fat cheddar cheese, shredded by hand

    Instructions:


    • Preheat oven to 375° F.
    • Heat oil and saute onions & garlic over med-high heat for 2 minutes.
    • Add mushrooms. Cook & stir 1 minute.
    • Add beef. Cook & stir 2 minutes or until pink is gone.
    • Add sauce. Bring to a boil, reduce heat and cook, uncovered, for 10 minutes.
    • While sauce simmers, cook pasta per package directions.
    • Spread ¼ cup of sauce in a 2 ¼ quart glass or pyrex casserole dish.
    • Make 2 layers in this order: drained pasta – sauce – cheese.
    • Bake uncovered for 20 minutes.

    Easy Cooking Recipes of Angel Hair Casserole by Jenny Jones


  • Recipes of No Knead or No Dutch Oven Bread

    Recipes of No Knead or No Dutch Oven Bread

    Recipes of No Knead or No Dutch Oven Bread by Jenny Jones


    In response to the many people who either do not have a Dutch oven or find it difficult to lift such a heavy pot, I decided to try making my no knead bread on a baking pan. Well guess what? It works. It makes a great loaf that’s soft inside with a beautiful golden crust. It’s not quite as crispy of a crust as the no Dutch oven bread or no knead bread method but it’s close. It’s important to find a way to create steam in the oven because steam is what makes a crispy crust. But even without steam, it still bakes up nicely but with a softer crust. Also read it; Easy Cooking Recipes of Angel Hair CasseroleEasy Cooking Recipes of Homemade Ciabatta Bread.

    For my ciabatta bread, which needs steam, I used a disposable foil 6-cup muffin pan, which you can place beside or just below the bread. But I also found a small 9 by 5-inch baking pan for $3.50 and a restaurant supply store and it works well too. It’s what I used for this loaf.

    It’s important to add the hot water right when you put in the bread and close the oven door right away. The steam is most effective right at the beginning. I use a metal measuring cup with a handle to pour the hot water. I hope my photos are helpful and that now, anyone without a Dutch oven can make this super easy, delicious, artisan bread.

    Click here for the recipe. – Jenny Jones

    Recipes of Cooking no Knead Bread


    For anyone without a no Dutch oven bread or finds them too heavy to lift, this recipe is for you. Aerate your flour before measuring! (For the overnight method, simply switch to COOL water and let the dough rest overnight on the counter top for 8 to 24 hours). – Jenny Jones

    • Prep Time: 5 minutes
    • Cook Time: 30 minutes
    • Total Time: 4 hours, 10 minutes
    • Makes: One loaf

    Ingredients:


    • 3 cups bread flour – all purpose works too (360 gms)
    • 1/4 teaspoon yeast (active dry or instant)
    • 1 teaspoon salt
    • 1 1/2 cups hot water, not boiling (354 mL) – I use hot tap water – about 125-130° F (about 2-3 Tablespoons extra flour for shaping)

    Instructions:


    • Combine flour, yeast and salt in a large bowl. Stir in water until it’s well combined.
    • Cover with plastic wrap and let stand at room temperature for 3 hours.
    • After 3 hours dough will become puffy and dotted with bubbles. Transfer it to a well-floured surface and sprinkle dough with a little flour. Using a scraper fold dough over 10-12 times & shape into a rough ball.
    • Place on a parchment paper-lined baking sheet and cover with a towel. Let stand on counter top for 35 minutes.
    • Meantime place a disposable 6-cup muffin pan or other small pan in the oven, making sure there is room for the baking pan – if not place the small pan on a lower rack. Preheat oven to 450° F.
    • After a 35-minute rest, the dough will puff up a little. Place it in the oven and carefully pour about 3/4 cup of hot tap water into 3 or 4 muffin cups or small pan. Close oven door immediately and bake for 30 minutes.
    • For a darker, crispier crust, remove loaf (with parchment) from pan and place directly on the oven rack (on the parchment paper). Bake for 10 more minutes.

    Recipes of No Knead or No Dutch Oven Bread by Jenny Jones


  • Recipe of Easy Homemade Caesar Salad

    Recipe of Easy Homemade Caesar Salad

    Recipe of Easy Homemade Caesar Salad by Jenny Jones


    I LOVE LOVE LOVE my Caesar salad! Now I don’t have to go to a fancy restaurant to get a classic Caesar salad. It was always a mystery to me because I thought I had to use whole anchovies but for me, anchovy paste is perfect and it’s also easy to use. It takes just minutes to make this dressing but you need the right ingredients. You just shake it all up in a jar and it’s done.

    Traditional Caesar salad is made with romaine lettuce and for me, hearts of romaine make the best presentation, not to mention homemade croutons. I usually make croutons with slices of my faster no knead bread and my recipe is super easy too. Click here to see how to make homemade croutons.

    I encourage everyone to eat a salad every day and now you can make one of those salads a classic Caesar.

    Click here for the recipe. – Jenny Jones

    Make easy Homemade Caesar Salad


    Anyone can make restaurant style Caesar salad at home with just a few ingredients. Hearts of romaine make the best presentation. – Jenny Jones

    • Prep Time: 10 minutes
    • Total Time: 10 minutes
    • Makes: 6 servings

    Ingredients:


    Dressing:

    • 1/3 cup olive oil
    • 3 Tablespoons fresh lemon juice
    • 2 teaspoons Worchestershire sauce
    • 2 teaspoons anchovy paste
    • 1 teaspoon Dijon mustard
    • 1 small clove garlic, minced

    Romaine lettuce
    Grated Parmesan cheese
    Homemade croutons (my recipe)

    Instructions:


    • Place dressing ingredients into a jar and shake to combine.
    • Toss with romaine lettuce, along with a little Parmesan cheese and top with a few croutons.

    Recipe of Easy Homemade Caesar Salad by Jenny Jones


  • Cooking of Vegetable Fried Rice

    Cooking of Vegetable Fried Rice

    Cooking of Vegetable Fried Rice by Jenny Jones


    There are three reasons why I love this recipe:

    • It’s vegetarian.
    • It has lots of super-food veggies.
    • It takes less than 20 minutes to make.

    This is a light, easy supper that I love to make, depending what I have on hand. My favorite combo is this one with broccoli, baby spinach, bell peppers, and peas. But I have also made it with other vegetables, sometimes broccollini instead of broccoli, Swiss chard instead of spinach, or other subs like asparagus, shredded carrots, bok choy, or Chinese snow peas, so you see it’s just a great way to get a variety of cooked vegetables in one meal. But I always use at least four different veggies.

    Cold cooked rice works best so I usually cook the rice the day before, and refrigerate it overnight. Mostly I use Uncle Ben’s converted rice but I have also made it with brown rice. Either way, if your rice is cooked in advance, this is a super-quick meal. Be sure to have everything ready before you start because a stir-fry means you don’t leave the pan once you start and it cooks in less than 10 minutes! So chop everything first and have everything in place before starting.

    Click here for the recipe. – Jenny Jones

    Vegetable Fried Rice cooking Recipe


    Cold, cooked rice works best so I cook and cool the rice overnight. Otherwise, you can cook the rice and spread it on a dinner plate, uncovered, to cool & release moisture. This meal cooks quickly so have everything ready before you start. Cook Vegetable Fried Rice, Use white or brown rice. – Jenny Jones

    • Prep Time: 10 minutes
    • Cook Time: 10 minutes
    • Total Time: 20 minutes
    • Makes: 2-3 servings

    Ingredients:


    • 2 teaspoons vegetable oil, divided
    • 1/3 cup chopped onion
    • 1 clove of garlic, minced
    • 1 cup chopped broccoli
    • 1/2 cup chopped bell pepper (any color)
    • 2 1/2 cups cooked rice (2/3 cup uncooked) – I use Uncle Ben’s Converted
    • 1 cup baby spinach, well packed (3/4 ounce)
    • 1/2 cup frozen peas
    • 2 eggs, beaten
    • 1 Tablespoon low sodium soy sauce
    • 1/8 teaspoon salt + pepper to taste

    Instructions:


    • Cook 2/3 cup rice, preferably in advance. Otherwise, cook and spread on a dinner plate to cool down.
    • Spread frozen peas on a paper towel to thaw.
    • In a sauté pan over medium-high heat, cook onion & garlic in 1 tsp.oil for 1 minute.
    • Add broccoli & peppers. Cook & stir for 1 minute.
    • Push veggies to the side, add 1 tsp. oil and stir-fry the rice in the oil for 1 minute, while gradually stirring in the veggies.
    • Stir in spinach and peas and push mixture to one side.
    • Add beaten eggs and cook until set, about 1 minute, and stir into rice.
    • Stir in soy sauce, salt & pepper.

    Cooking of Vegetable Fried Rice


  • Whole Wheat (No Knead) Olive Bread

    Whole Wheat (No Knead) Olive Bread

    Whole Wheat (No Knead) Olive Bread by Jenny Jones


    Learn How to Cooking Olive Bread? Look what I made! I decided to experiment with my faster no-knead bread and make olive bread. I’ve been making the plain bread regularly with 100% whole wheat flour and for a softer loaf, I also make it with 2 cups of whole wheat and one cup of bread flour. I’ve had olive bread before and loved it. I had a jar of olives handy so I made this loaf yesterday with my 2/3 + 1/3 flour mixture and WOW! It’s moist and soft enough for sandwiches and so delicious. I even had it for breakfast. (the crispy crust is the best part!) Olive bread is a way to include heart-healthy olives in your diet. If you haven’t tried the no knead method for bread, it’s amazingly easy.

    I first posted my faster recipe for plain bread and then another recipe for my whole wheat version. Now I have this fabulous olive bread and I am posting the recipe here because it’s so simple. To make my no knead whole wheat olive bread, you would follow the method used in my whole wheat version but with the ingredients below:

    • 2 cups whole wheat flour
    • 1 cup bread or all purpose flour
    • 1/4 teaspoon yeast
    • 1/2 teaspoon salt (reduced from original version due to salt in the olives)
    • 3/4 cup chopped, patted dry kalamata olives
    • 1 1/2 cups of cool water

    I just posted the entire recipe in the Breads category so now you can just.

    Click Here for the recipe. – Jenny Jones

    Recipes of No Knead Greek Olive Bread


    This loaf works best with the overnight method, which uses cool water. Olives are salty so with this recipe, you don’t need as much salt as with other breads. Always aerate your flour before measuring. – Jenny Jones
     
    • Prep Time: 5 minutes
    • Cook Time: 40 minutes
    • Total Time: 13 hours 
    • Makes: One loaf 

    Ingredients:


    • 2 cups whole wheat flour
    • 1 cup bread flour or all purpose flour
    • 1/2 teaspoon salt
    • 1/4 teaspoon yeast (instant or active dry)
    • 3/4 cup chopped pitted kalamata olives, patted dry
    • 1 1/2 cups cool water
    • about 2 Tablespoons extra flour for shaping

    Instructions:


    1. Combine flours, salt, yeast, and olives in a large bowl. Stir in water until it’s well combined.
    2. Cover with plastic wrap and let stand at room temperature for 10 to 12 hours (even longer is fine).
    3. Dough will become puffy. Transfer it to a lightly floured surface and sprinkle with a little flour. Using a scraper, fold dough over 10 – 12 times & shape into a rough ball.
    4. Place in a parchment-paper lined bowl and cover with a towel. Let stand on counter top for 2 hours.
    5. After 1 1/2 hours, place a 5-quart Dutch oven with lid in a cold oven and preheat to 450° F. My oven takes 35 minutes to reach 450.
    6. When oven reaches 450 (& dough has stood for 2 hours) carefully, using oven gloves, lift the parchment paper and dough from the bowl and place gently into the hot pot. (parchment paper goes in the pot too) Cover and bake for 30 minutes.
    7. After 30 minutes, remove lid and parchment paper. Return, uncovered, to oven and bake about 10 more minutes.

    Whole Wheat (No Knead) Olive Bread by Masterchef Jenny


  • Masterchef Jenny: Recipe of Homemade Honey Wheat Bread

    Masterchef Jenny: Recipe of Homemade Honey Wheat Bread

    Recipe of Homemade Honey Wheat Bread by Jenny Jones 


    Learn How to make it Easy Honey Wheat Bread? Here’s another super easy, healthy bread recipe and it’s by popular demand. My first “simple whole wheat bread” has been hugely popular but a lot of people have asked if they can eliminate the egg or add honey. YES and YES. This easy honey wheat bread has no egg and it’s made with… you guessed it: honey. The interior is nice and soft and it tastes really good.

    Masterchef Jenny Recipe of Homemade Honey Wheat Bread

    It takes a little longer to make than my other whole wheat bread (the one with the egg) and it doesn’t rise quite as tall so if you want it taller or faster, try Simple Whole Wheat Bread. But if honey-wheat bread is your preference, this recipe only takes a few minutes longer. And it works with either honey or sugar, and any kind of vegetable oil you like. I mostly use extra light olive oil.

    Having a warm spot to rise your dough helps it grow faster and I’m lucky to have a warming drawer in my kitchen but I have some other ideas on where you can rise dough in This Blog. I hope the bread industry isn’t mad at me because so many people have said, “I don’t buy bread any more,” and that includes me. Between my no knead breads and whole wheat loaves, I always bake my own bread and I’m saving money… and spending it on spatulas! I hope you’ll try my honey wheat bread and somebody send me a picture!

    Click here for the recipe. – Jenny Jones

    How to make Easy Honey Wheat Bread?


    There’s only one rise with this simple and easy recipe for a healthy, soft whole wheat loaf. It works with either honey or sugar. Oil should be at room temperature and ALWAYS AERATE YOUR FLOUR BEFORE MEASURING. – Jenny Jones

    Prep Time: 15 minutes

    Cook Time: 25 minutes

    Total Time: 1 hour, 45 minutes

    Makes: One loaf

    Start to Make Easy Honey Wheat Bread

    Ingredients:


    • 1 2/3 cups whole wheat flour
    • 1/3 cup all-purpose or bread flour
    • 2 teaspoons (1 packet / 7 grams) instant yeast (or active dry yeast)
    • 1 teaspoon salt
    • 1 cup 1% milk, heated to 120-130° F for instant yeast (or 110-120°F for active dry)
    • 3 Tablespoons oil (any vegetable oil or extra light olive oil)
    • 2 Tablespoons honey (or sugar)
    • about 1/4 cup additional all-purpose or bread flour

    Instructions:


    • Place flours, yeast & salt in a large mixing bowl.
    • Stir in milk, followed by oil and honey.
    • Beat on high for 2 minutes.
    • Add about 1/4 cup all-purpose or bread flour until dough forms a mass.
    • Place dough on floured surface and knead 50 turns.
    • Cover and let rest 10 minutes.
    • Shape into a loaf and place in greased 8 1/2 x 4 1/2-inch loaf pan.
    • Cover and let rise in a warm spot until it’s doubled in size, about one hour.
    • Preheat oven to 375° F & bake for 25 minutes. After the first 15 minutes, I cover the top of the loaf with a foil tent to prevent over-browning.

    Easy Whole Wheat Bread – Ready in 90 Minutes


    Here are Video for Better help how to do make it. The technique for this bread is exactly like, Simple Whole Wheat Bread.